
6. Toolchain
Once your (virtual/)machine has been set up you can compile, customize the BSP for your board, write and debug applications, change the file system on-the-fly directly on the board, etc. This chapter will guide you to the basic use of the most important tools you can use to build customize, develop and tune your board.
6.1. Bitbake
Bitbake is the most important and powerful tool available inside Yocto/OpenEmbedded. It takes as input configuration files and recipes and produces what it is asked for, that is, it can build a package, the Linux kernel, the bootloader, an entire operating system from scratch, etc.
A recipe (.bb file) is a collection of metadata used by BitBake to set variables or define additional build-time tasks. By means of variables, a recipe can specify, for example, where to get the sources, which build process to use, the license of the package, an so on. There is a set of predefined tasks (the fetch task for example fetches the sources from the network, from a repository or from the local machine, than the sources are cached for later reuses) that executed one after the other get the job done, but a recipe can always add custom ones or override/modify existing ones. The most fine-graned operation that Bitbake can execute is, in fact, a single task.
6.1.1. Environment
To properly run Bitbake, the first thing you need to do is setup the shell environment. Luckily, there is a script that takes care of it, all you need to do is:
source /path/to/oe-init-build-env /path/to/build/directoryInside the virtual machine, you can find oe-init-build-env script inside:
/home/architech/architech_sdk/architech/microzed/yocto/pokyIf you omit the build directory path, a directory named build will be created under your current working directory.
By default, with the SDK, the script is used like this:
source /home/architech/architech_sdk/architech/microzed/yocto/poky/oe-init-build-envYour current working directory changes to such a directory and you can customize configurations files (that the environment script put in place for you when creating the directory), run Bitbake to build whatever pops to your mind as well run hob. If you specify a custom directory, the script will setup all you need inside that directory and will change your current working directory to that specific directory.
Important
The build directory contains all the caches, builds output, temporary files, log files, file system images... everything!
The default build directory for Microzed is located under:
/home/architech/architech_sdk/architech/microzed/yocto/buildand the splash screen has a facility (a button located under Microzed’s page) that can take you there with the right environment already in place so you are productive right away.
Important
6.1.2. Configuration files
Configuration files are used by Bitbake to define variables value, preferences, etc..., there are a lot of them. At the beginning you should just worry about two of them, both located under conf directory inside your build directory, we are talking about local.conf and bblayers.conf.
local.conf contains your customizations for the build process, the most important variables you should be interested about are: MACHINE, DISTRO, BB_NUMBER_THREADS and PARALLEL_MAKE. MACHINE defines the target machine you want compile against. The proper value for Microzed is microzed:
MACHINE ??= "microzed"DISTRO let you choose which distribution to use to build the root file systems for the board. The default distribution to use with the board is:
DISTRO ?= "poky"BB_NUMBER_THREADS and PARALLEL_MAKE can help you speed up the build process. BB_NUMBER_THREADS is used to tell Bitbake how many tasks can be executed at the same time, while PARALLEL_MAKE contains the -j option to give to make program when issued. Both BB_NUMBER_THREADS and PARALLEL_MAKE are related to the number of processors of your (virtual) machine, and should be set with a number that is two times the number of processors on your (virtual) machine. If for example, your (virtual) machine has/sees four cores, then you should set those variables like this:
BB_NUMBER_THREADS ?= "8"
PARALLEL_MAKE ?= "-j 8"
bblayers.conf is used to tell Bitbake which meta-layers to take into account when parsing/looking for recipes, machine, distributions, configuration files, bbclasses, and so on. The most important variable contained inside bblayers.conf is BBLAYERS, it’s the variable where the actual meta-layers layout get specified.
All the variables value we just spoke about are taken care of by Architech installation scripts.
6.1.3. Command line
With your shell setup with the proper environment and your configuration files customized according to your board and your will, you are ready to use Bitbake. The first suggestion is to run:
bitbake -hBitbake will show you all the options it can be run with. During normal activity you will need to simply run a command like:
bitbake <recipe name>for example:
bitbake core-image-minimal-devSuch a command will build bootloader, Linux kernel and a root file system. core-image-minimal-dev tells Bitbake to execute whatever recipe
/home/architech/architech_sdk/architech/microzed/yocto/poky/meta/recipes-extended/images/core-image-minimal-dev.bbyou just place the name of the recipe without the extension .bb.
Of course, there are times when you want more control over Bitbake, for example, you want to execute just one task like recompiling the Linux kernel, no matter what. That action can be achieved with:
bitbake -c compile -f virtual/kernelwhere -c compile states the you want to execute the do_compile task and -f forces Bitbake to execute the command even if it thinks that there are no modifications and hence there is no need to to execute the same command again.
Another useful option is -e which gets Bitbake to print the environment state for the command you ran.
The last option we want to introduce is -D, which can be in fact repeated more than once and asks Bitbake to emit debug print. The amount of debug output you get depend on many times you repeated the option.
Of course, there are other options, but the ones introduced here should give you an head start.
6.2. Hob
Hob is a graphical interface for Bitbake. It can be called once Bitbake environment has been setup (see Bitbake) like this:
Host
hob
once open, you are required to select the machine you want to compile against

after that, you can select the image you want to build and, of course, you can customize it.
6.3. Eclipse
Eclipse is an integrated development environment (IDE). It contains a base workspace and the Yocto plug-in system to compile and debug a program for Microzed. Hereafter, the operating system that runs the IDE/debugger will be named host machine, and the board being debugged will be named target machine. The host machine could be running as a virtual machine guest operating system, anyway, the documentation for the host machine running as a guest operating system and as host operating system is exactly the same.
To write your application you need:
- a root file system filesystem (you can use bitbake/hob to build your preferred filesystem) with development support (that is, it must include all the necessary libraries, header files, the tcf-agent program and gdbserver) included
- a media with the root filesystem installed and, if necessary, the bootloader
- Microzed powered up with the aforementioned root file system
- a working serial console terminal
- a working network connection between your workstation and the board (connector J11), so, be sure that:
- your board has ip address 192.168.0.10 on interface eth0, and
- your PC has an ip address in the same family of addresses, e.g. 192.168.0.100.
6.3.1. Creating the Project
You can create two types of projects: Autotools-based, or Makefile-based. This section describes how to create Autotools-based projects from within the Eclipse IDE. Launch Eclipse using Architech Splashscreen just click on Develop with Eclipse.
To create a project based on a Yocto template and then display the source code, follow these steps:
- Select File→New→Project...
- Under C/C++, double click on C Project to create the project.
- Click on “Next” button
- Expand Yocto Project ADT Autotools Project.
- Select Hello World ANSI C Autotools Project. This is an Autotools-based project based on a Yocto Project template.
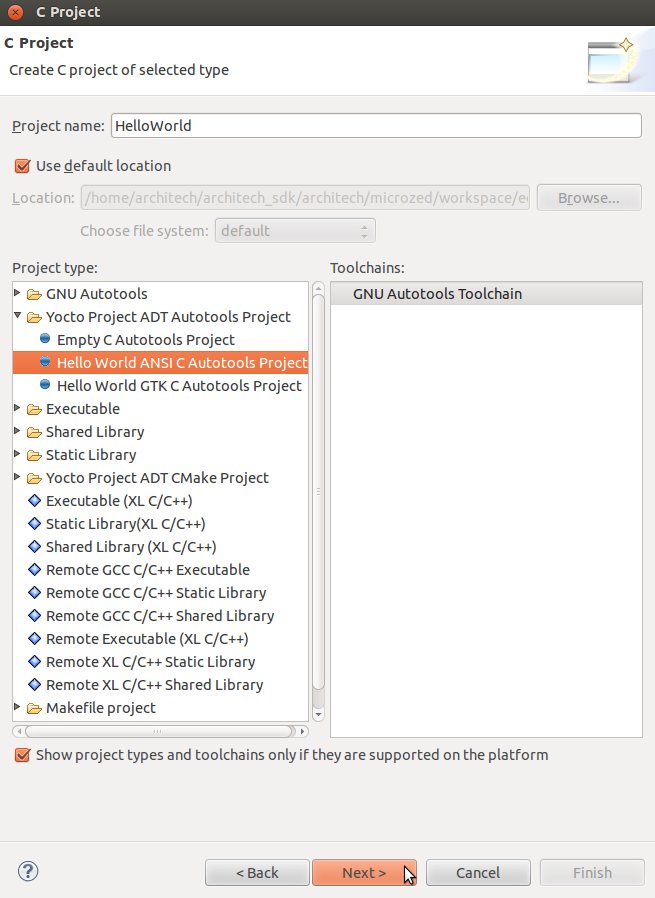
- Put a name in the Project name: field. Do not use hyphens as part of the name.
- Click Next.
- Add information in the Author and Copyright notice fields.
- Be sure the License field is correct.
- Click Finish.
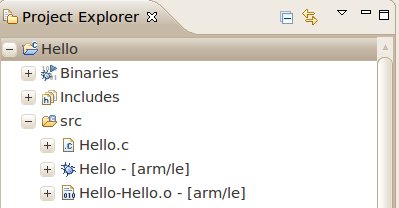
Note
If the “open perspective” prompt appears, click Yes so that you enter in C/C++ perspective. The left-hand navigation panel shows your project. You can display your source by double clicking on the project source file.
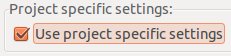
- Select Project→Properties→Yocto Project Settings and check Use project specific settings
6.3.2. Building the Project
To build the project, select Project→Build Project. The console should update with messages from the cross-compiler. To add more libraries to compile:
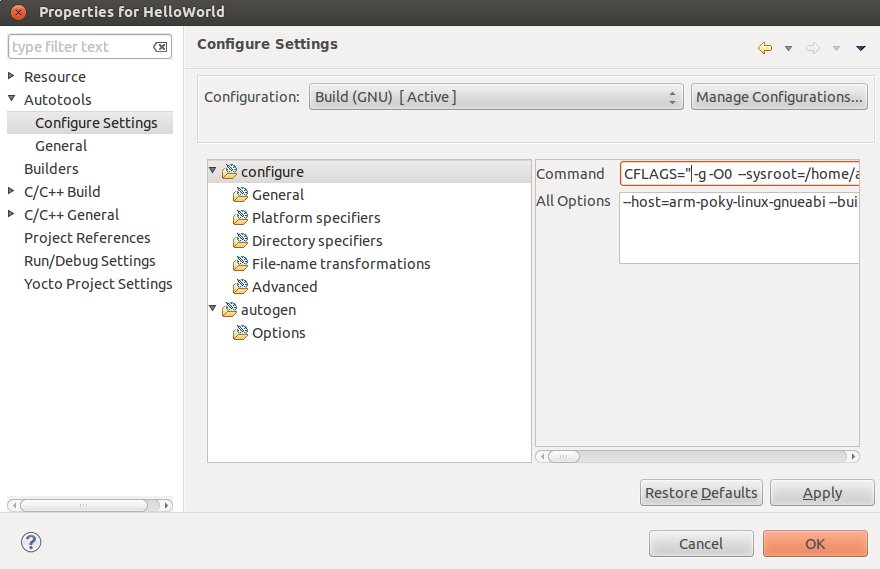
- Click on Project→Properties.
- Expand the box next to Autotools.
- Select Configure Settings.
- In CFLAGS field, you can add the path of includes with -Ipath_include
- In LDFLAGS field, you can specify the libraries you use with -lname_library and you can also specify the path where to look for libraries with -Lpath_library
- Click on Project→Build All to compile the project
Note
All libraries must be located in /home/architech/architech_sdk/architech/microzed/sysroot subdirectories.
6.3.3. Deploying and Debugging the Application
Connect Microzed console to your PC and power-on the board. Once you built the project and the board is running the image, use minicom to run tcf-agent program in target board:
microzed login: root
/etc/init.d/tcf-agent restart
On the Host machine, follow these steps to let Eclipse deploy and debug your application:
- Select Run→Debug Configurations...
- In the left area, expand C/C++ Remote Application.
- Locate your project and select it to bring up a new tabbed view in the Debug Configurations Dialog.
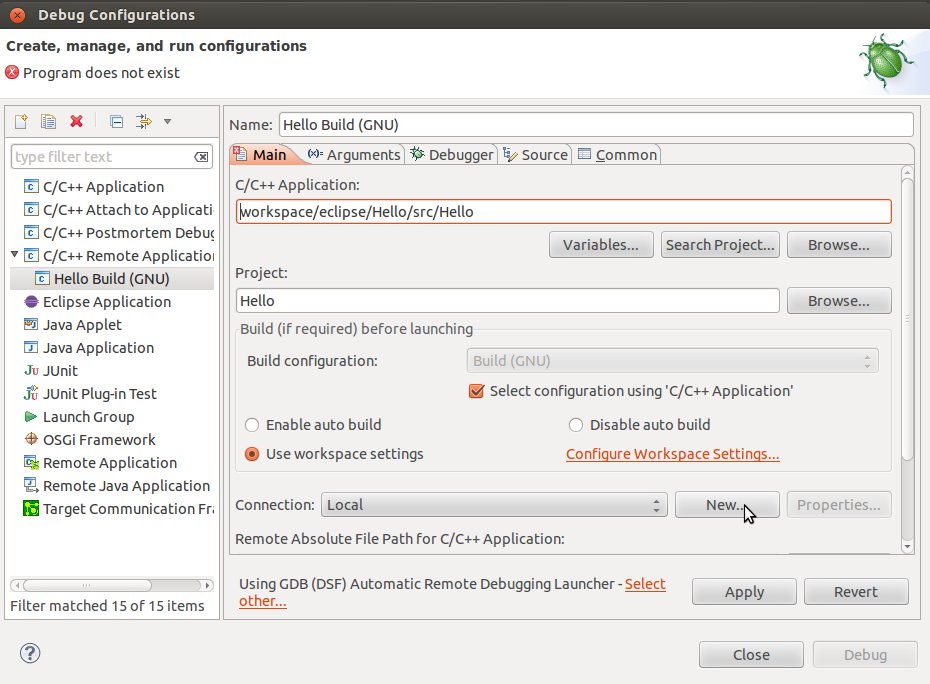
- Insert in C/C++ Application the filepath of your application binary on your host machine.
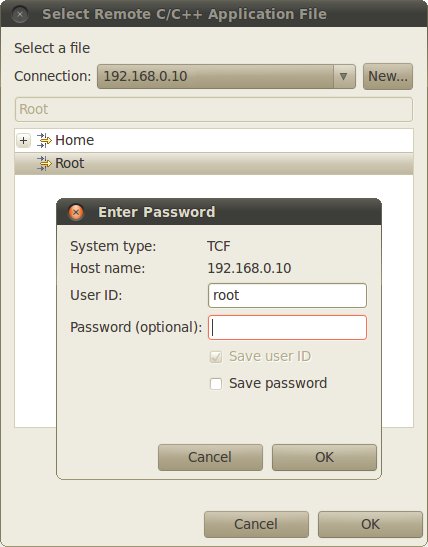
- Click on “New” button near the drop-down menu in the Connection field.
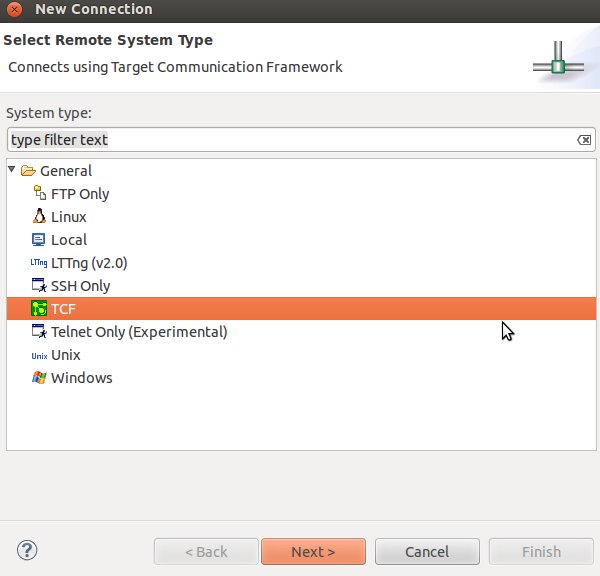
- Select TCF icon.
- Insert in Host Name and Connection Name fields the IP address of the target board. (e.g. 192.168.0.10)
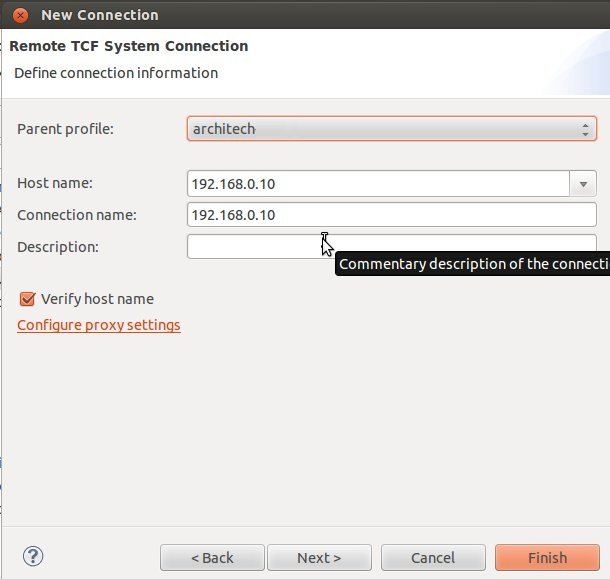
- Press Finish.
- Use the drop-down menu now in the Connection field and pick the IP Address you entered earlier.
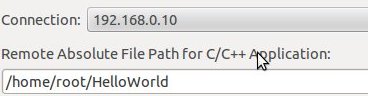
- Enter the absolute path on the target into which you want to deploy the application. Use Browse button near Remote Absolute File Path for C/C++Application: field. No password is needed.
- Enter also in the target path the name of the application you want to debug. (e.g. HelloWorld)
- Select Debugger tab
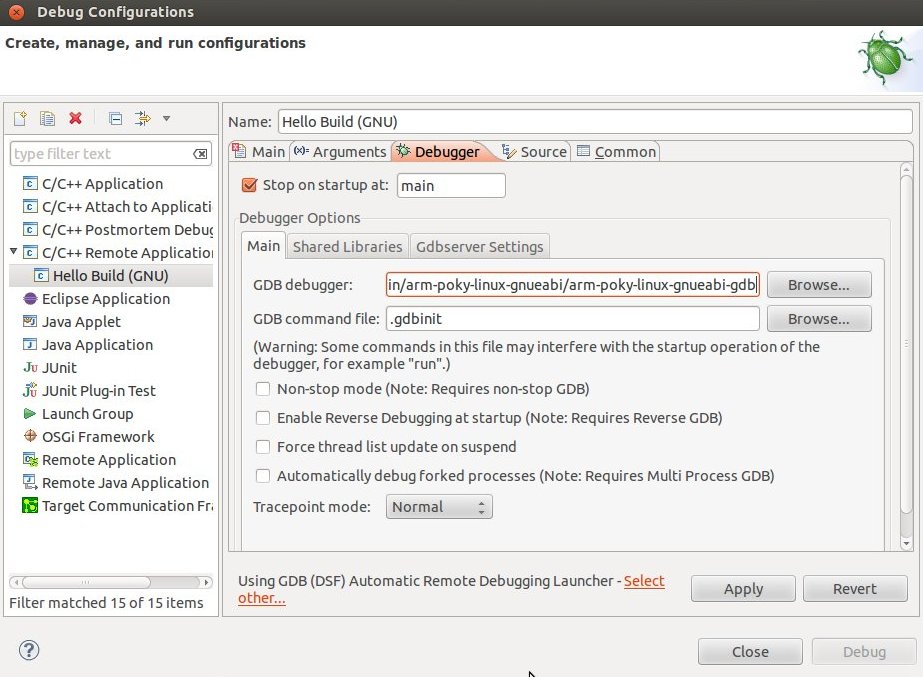
- In GDB Debugger field, insert the filepath of gdb for your toolchain
/home/architech/architech_sdk/architech/microzed/toolchain/sysroots/i686-pokysdk-linux/usr/bin/arm-poky-linux-gnueabi/arm-poky-linux-gnueabi-gdb- In Debugger window there is a tab named Shared Library, click on it.
- Add the libraries paths lib and usr/lib of the rootfs (which must be the same used in the target board)
/home/architech/architech_sdk/architech/microzed/sysroot/lib
/home/architech/architech_sdk/architech/microzed/sysroot/usr/lib- Click Debug to bring up a login screen and login.
- Accept the debug perspective.
Important
If debug does not work, check on the board if tcf-agent is running and gdbserver has been installed.
6.4. Cross compiler
Yocto/OpenEmbedded can be driven to generate the cross-toolchain for your platform. There are two common ways to get that:
bitbake meta-toolchainor
bitbake <image recipe name> -c populate_sdkThe first method provides you the toolchain, you need to provide the file system to compile against, the second method provides both the toolchain and the file system along with -dev and -dbg packages installed.
Both ways you get an installation script.
The virtual machine has a cross-toolchain installed for each board, each generated with meta-toolchain. To use it just do:
source /home/architech/architech_sdk/architech/microzed/toolchain/environmentto compile Linux user-space stuff. If you want to compile kernel or bootloader then do:
source /home/architech/architech_sdk/architech/microzed/toolchain/environment-nofsand you are ready to go.
6.5. Opkg

Useful commands:
- update the list of available packages:
opkg update- list available packages:
opkg list- list installed packages:
opkg list-installed- install packages:
opkg install <package 1> <package 2> ... <package n>- list package providing <file>
opkg search <file>- Show package information
opkg info <package>- show package dependencies:
opkg whatdepends <package>- remove packages:
opkg remove <package 1> <package 2> ... <package n>6.5.1. Force Bitbake to install Opkg in the final image
With some images, Bitbake (e.g. core-image-minimal) does not install the package management system in the final target. To force Bitbake to include it in the next build, edit your configuration file
/home/architech/architech_sdk/architech/microzed/yocto/build/conf/local.confand add this line to it:
IMAGE_FEATURES_append = " package-management"6.5.2. Create a repository
opkg reads the list of packages repositories in configuration files located under /etc/opkg/. You can easily setup a new repository for your custom builds:
- Install a web server on your machine, for example apache2:
sudo apt-get install apache2- Configure apache web server to “see” the packages you built, for example:
sudo ln -s /home/architech/architech_sdk/architech/microzed/yocto/build/tmp/deploy/ipk/ /var/www/microzed-ipk- Create a new configuration file on the target (for example /etc/opkg/my_packages.conf) containing lines like this one to index the packages related to a particular machine:
src/gz microzed http://192.168.0.100:8000/microzed-ipk/microzedTo actually reach the virtual machine we set up a port forwarding mechanism in Chapter Virtual Machine so that every time the board communicates with the workstation on port 8000, VirtualBox actually turns the communication directly to the virtual machine operating system on port 80 where it finds apache waiting for it.
- Connect the board and the personal computer you are developing on by means of an ethernet cable
- Update the list of available packages on the target
opkg update